Pre-Requisites
- A MySQL Database running on NetApp Storage
- 1 running instance of NetApp SnapCenter 3.0+
- 1 running instance of Apprenda 6.8 with atleast 2 Linux Hosts added
SnapCenter Configuration
Add hosts in in SnapCenter
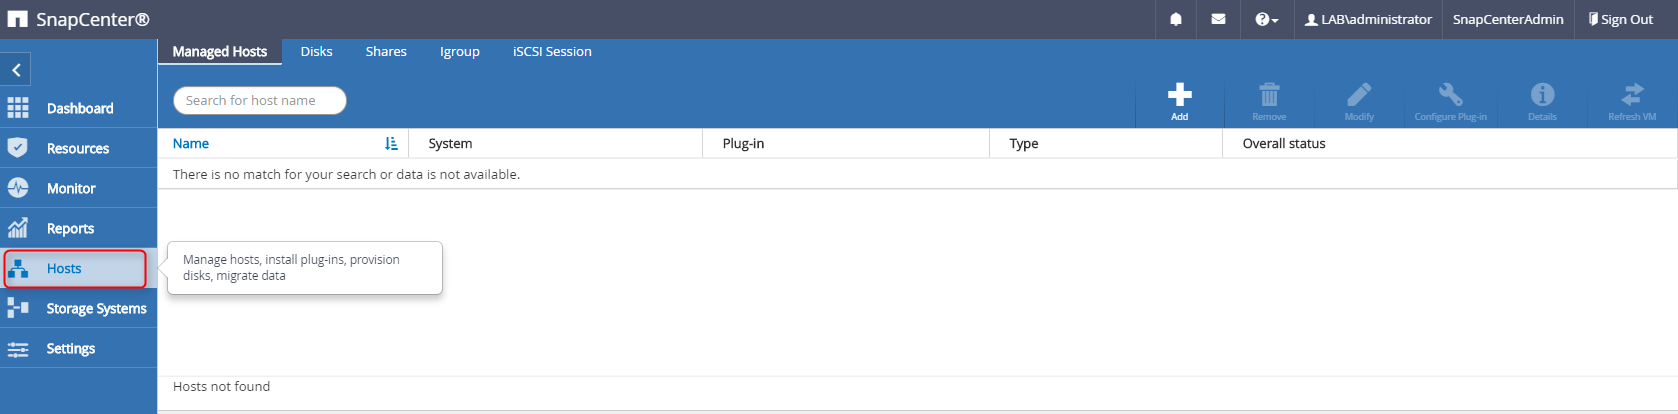
1.1) Click on the hosts tab in SnapCenter
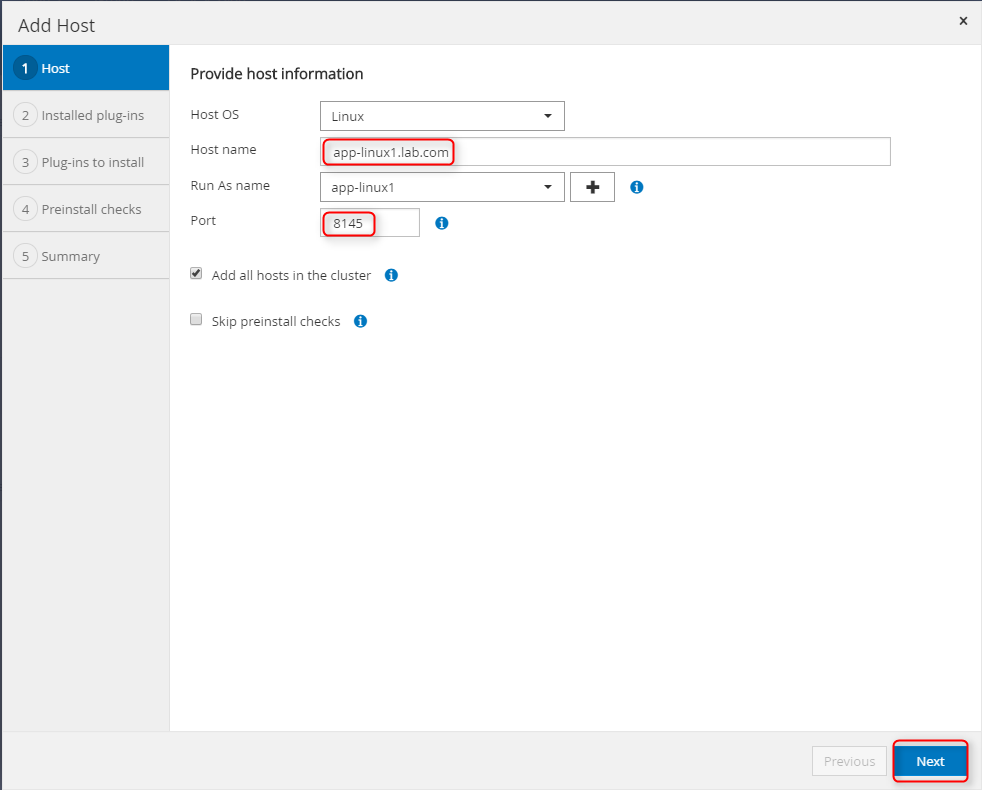
1.2) Once the hosts screen pops up, enter the hostname of your linux host and a free port for the snapcenter agent to run and click Next.
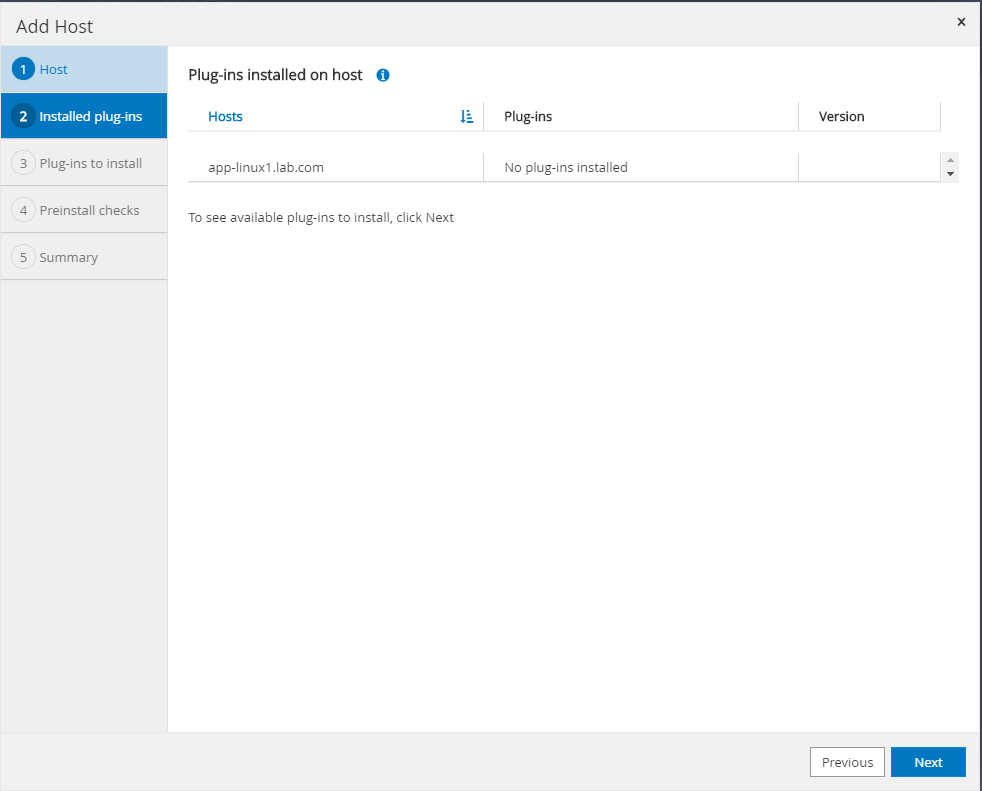
1.3) On the next screen, a list of plugins installed on the host will be shown. If a fresh configration is being done, this list will be empty. Verify your linux host name and click Next to view the list of available plugins for installation.
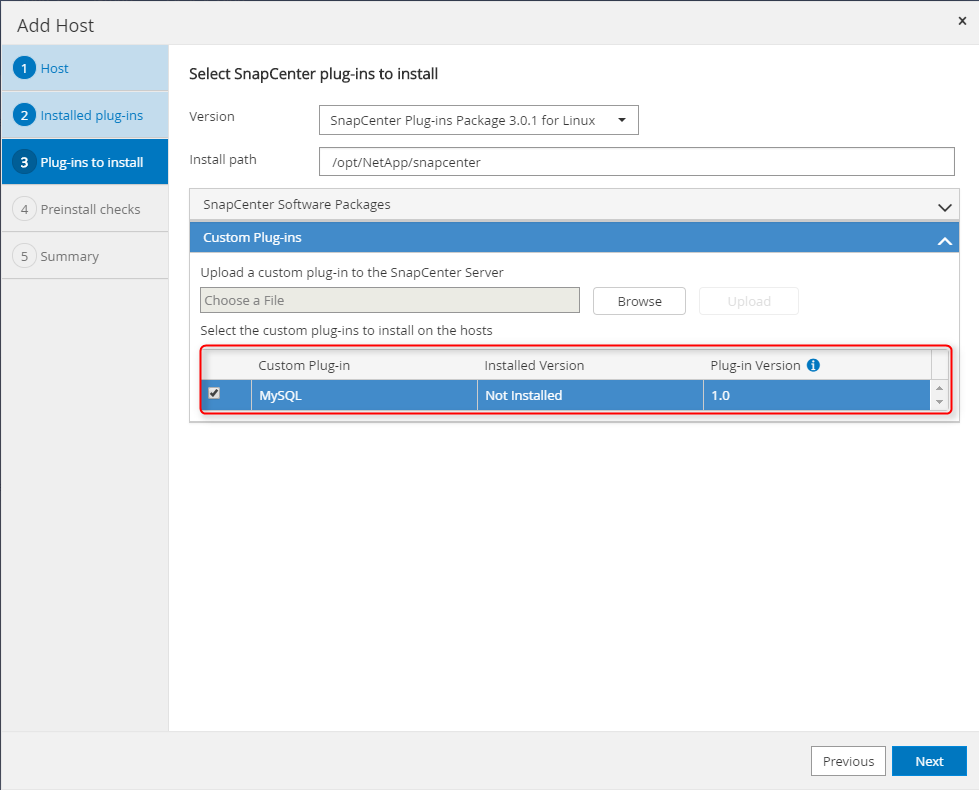
1.4) Select the MySQL plugin checkbox in the Custom Plugins section to install the MySQL custom plugin on the host.
1.5) Click Next to run the pre-install of plugin installation checks on the linux host.
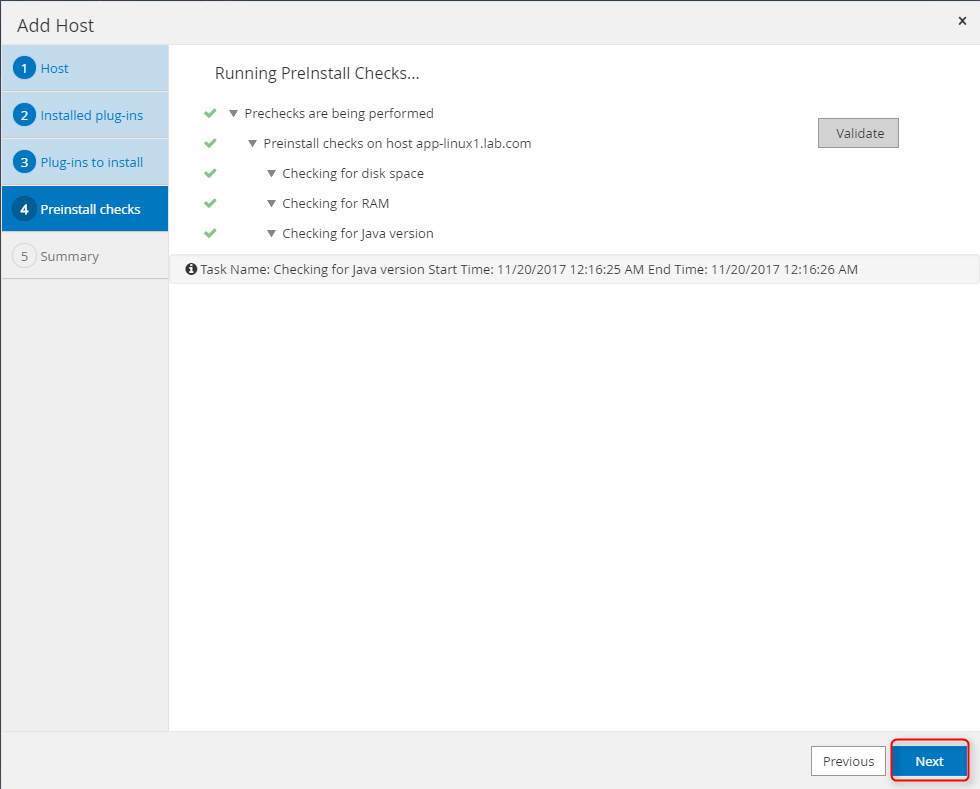
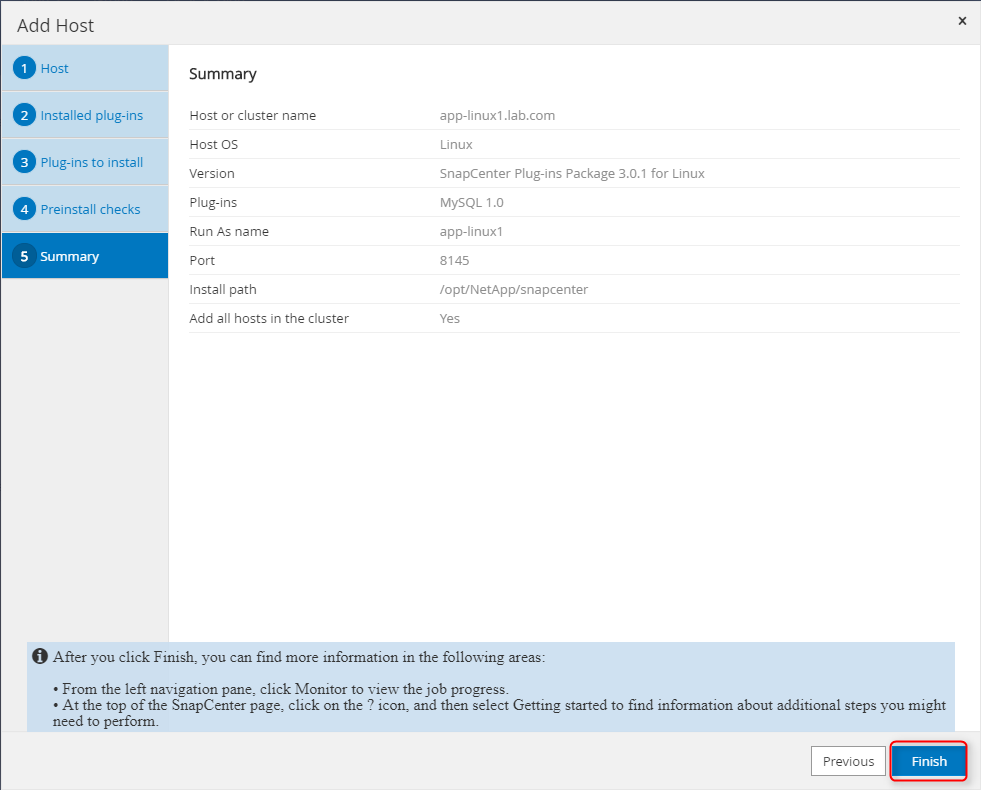
1.6) Check the details in the Summary tab and click Finish to add a linux host with MySQL plugin in SnapCenter
Note
Add atleast 2 linux hosts in SnapCenter instance
- Add Database (Resources) in SnapCenter
To protect a database with Snapcenter , it needs to be added in SnapCenter using following steps:-
2.1) Click the resources tab in Snapcenter
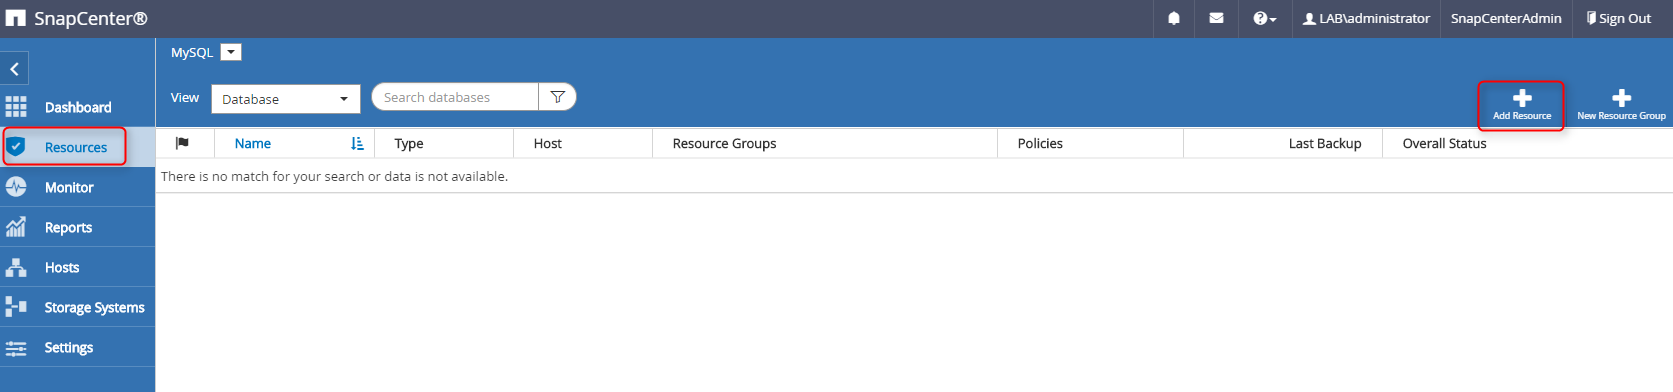
2.2) Provide the following Database(resource) details :-

Field Value Name Database Name Hostname Hostname of production database Type Database Run As Name Credentials of the production database 2.3) Add/Select Storage footprint(Select the NetApp Volume) for the MySQL database

2.4) Add Resource Settings for SnapCenter’s MySQL plugin. These are mandatory for the SnapCenter MySQL plugin.
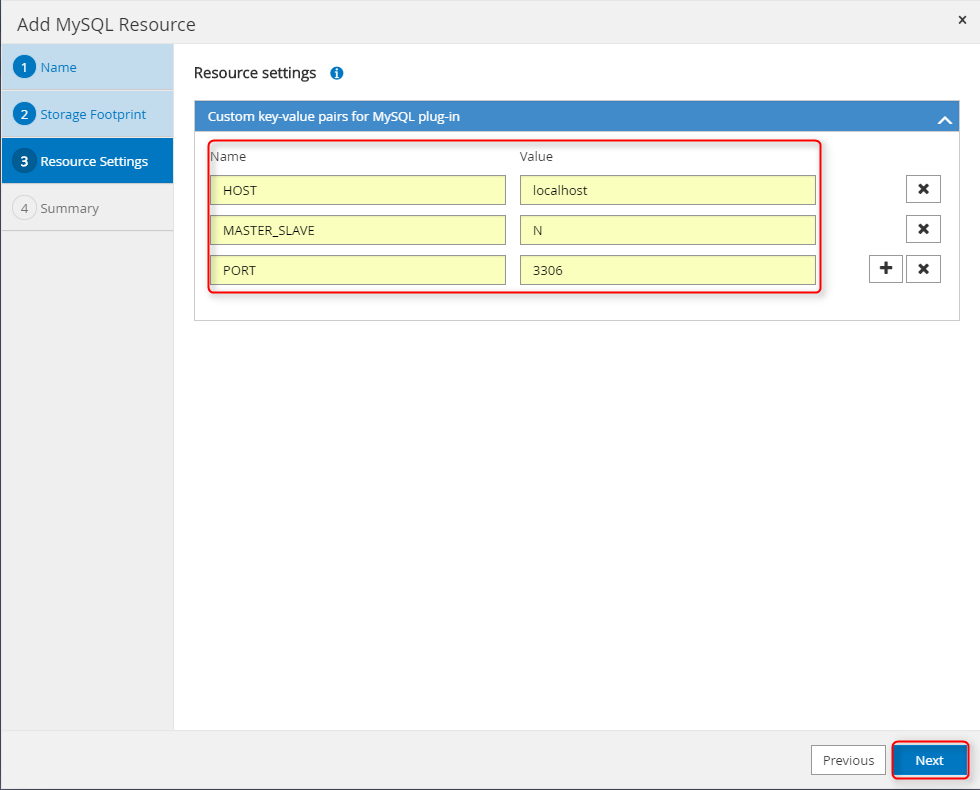
Field Value HOST Database Connection Name MASTER_SLAVE N PORT Database PORT
- Add MySQL start scripts on linux hosts
This integretions uses a shell script(restart-mysql.sh) on the linux hosts to restart mysql databases during restore process. This script should be present at /var/lib/restart-mysql.sh on all linux hosts.

restart-mysql.sh
service mysqld stop;
/usr/sbin/mysqld --pid-file=/var/run/mysqld/mysqld2.pid --socket=/var/lib/mysql2/mysql.sock --user=mysql --datadir=/var/libmysql2 &
Apprenda Configuration
Setting up Apprenda Custom Properties
Apprenda uses few custom properties in this integretion to interact with Snapcenter To configure these custom properties, 1.1) Login to Apprenda DashBoard 1.2) Select Configurataion in the top menu bar 1.3) Select Custom Properties
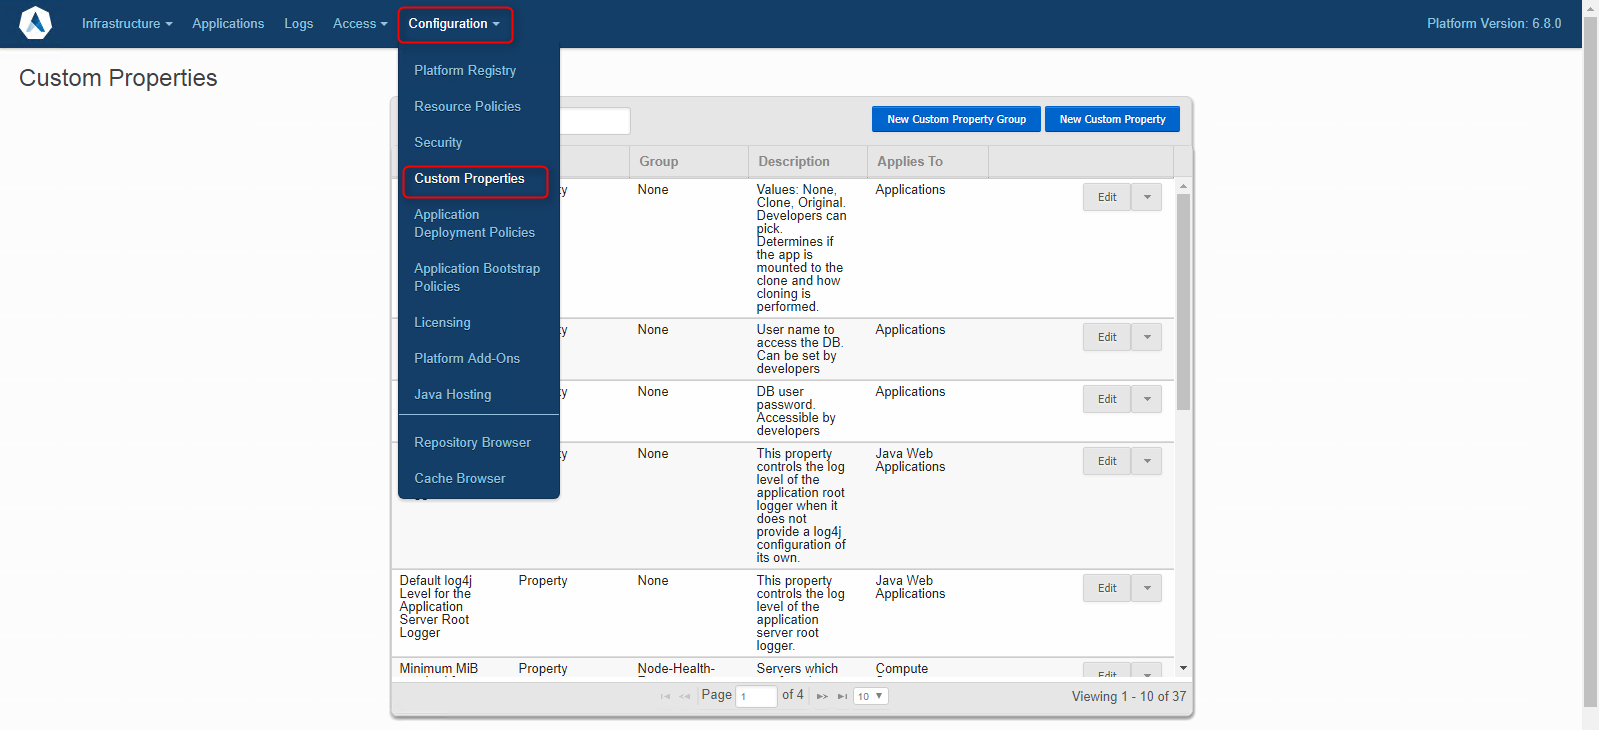
Following custom properties need to be setup in this integretion
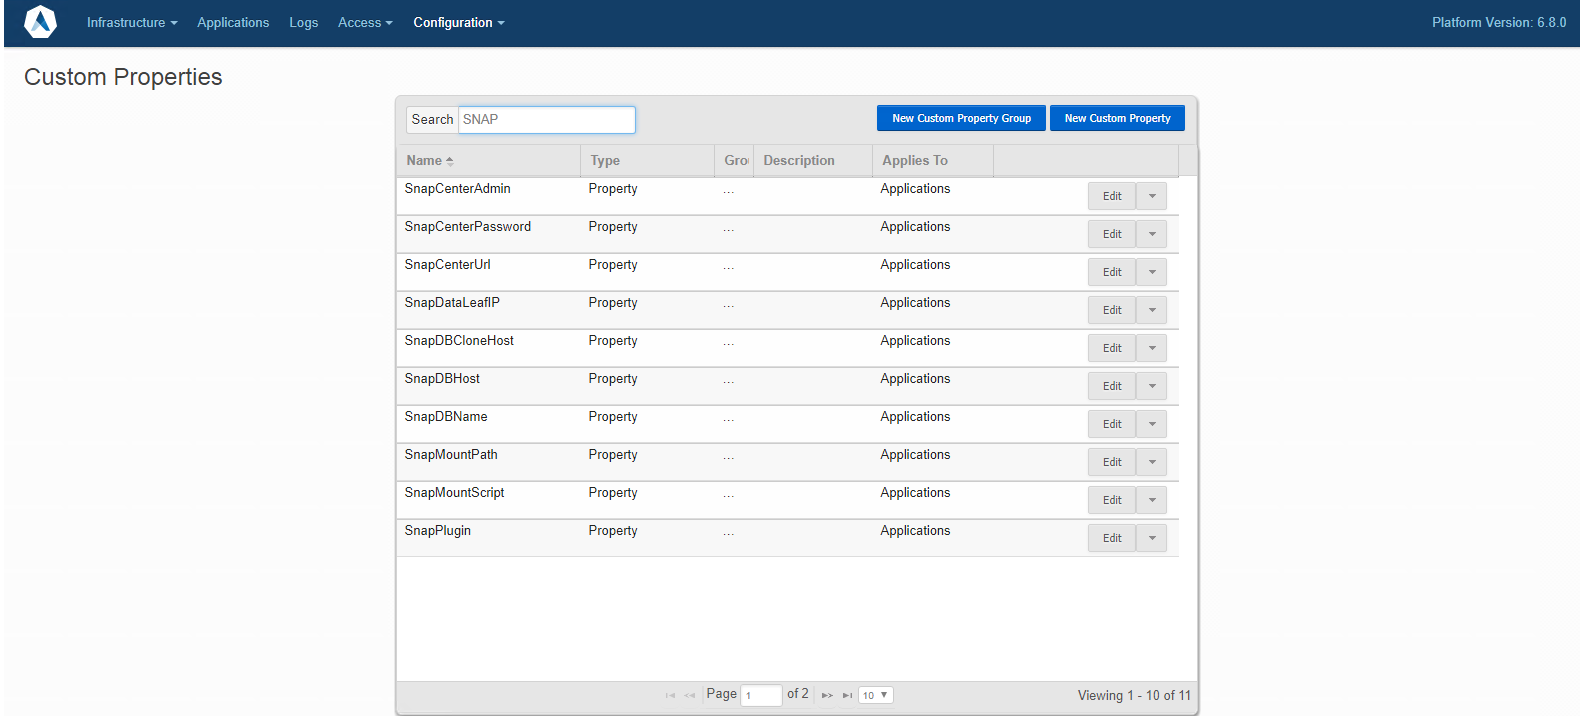
Property Value Description SnapCenterAdmin <SnapCenter Username> Enter the SnapCenter username in (DomainUserName) format SnapCenterPassword <SnapCenter Password> Enter the SnapCenter password SnapCenterUrl <SnapCenter URL with port> Enter full SnapCenter URL with port i.e https://ip:port/ SnapDataLeafIP Enter the DataLIF ip of the storage SnapDBHost <Hostname of production DB> Enter the Hostname of your production db SnapDBCloneHost <Hostname of clone hosts> Enter the Hostnames where the clones can be mounted SnapDBName <Name of Production Database> Enter name of the procdtion database SnapMountPath <Mount path to mount the clones> Enter the path to mount the clones SnapMountScript <Location of Shell script to restart MySQL Service> Location of the RestartMySQL script (restart-mysql.sh) SnapPlugin MySQL Currently only MySQL is supported with this integretion
Setup a Apprenda BootStrap Policy
2.1) Apprenda Bootstrap policy allows us to select the
2.2) Download the bootstrap policy here
2.3) Upload the BootStrap policy to Configration > Application Bootstrap Policies as shown in below figure:
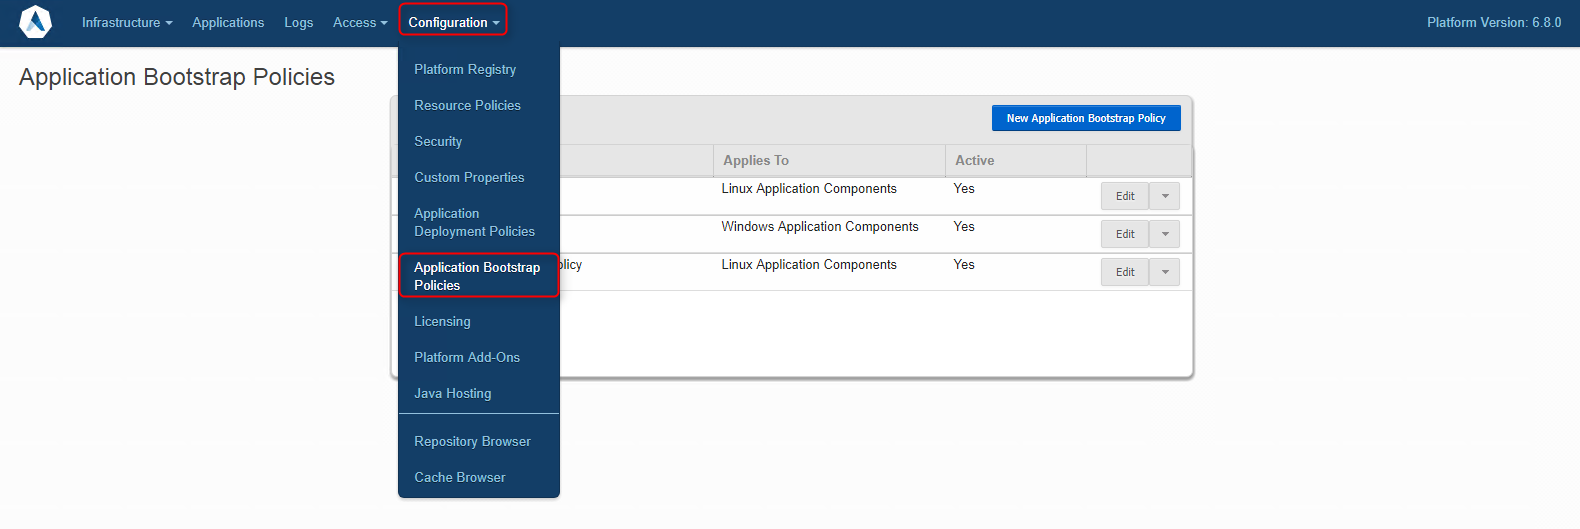
2.4) Click Save
Adding the DbDevTest Extension in Apprenda
3.1) Download the extention here
3.2) Create a New app in Apprenda Developer portal(http://<<your-apprenda-url>>/developer
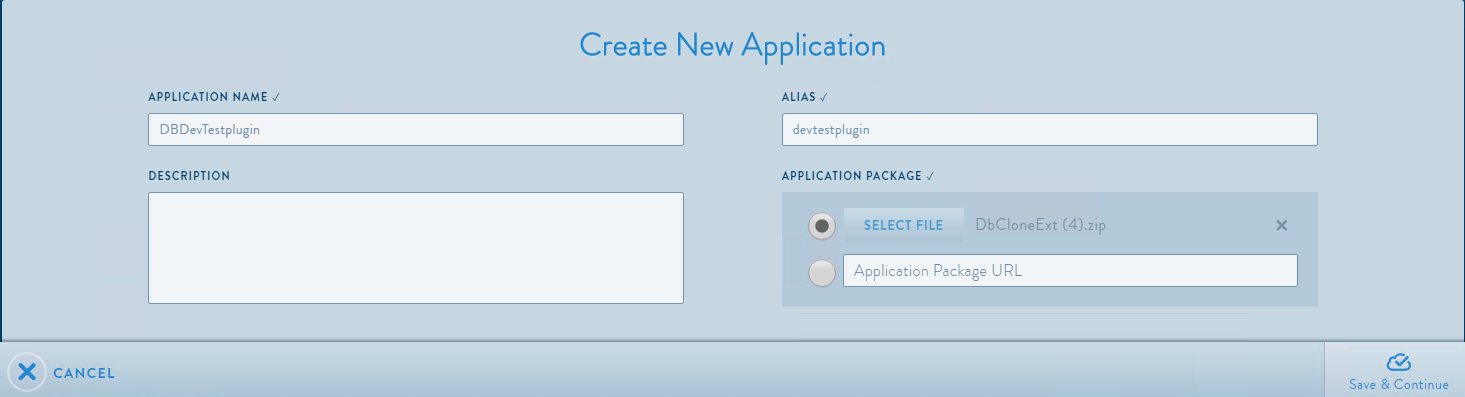
3.3) Click Save and Continue
Configuring an Application on Apprenda to use DBDevTestPlugin
- Add the following Deployment properties to your Apprenda App from Configure>Application>Deployment tab of your application.
Property Value Description Database User <Username of MySQL Database> Enter the mysql username application uses to connect to MySQL Database SnapDBName <Name of Database used by Application> Name of Database used by application DBCloneType <RestoreClone,CloneOrignal> Select the plugin function to restore/clone via dropdown SnapPlugin <MySQL> Currently only MySQL is supported with this integretion User Credentials <Password for MySQL User> Password for MySQL User 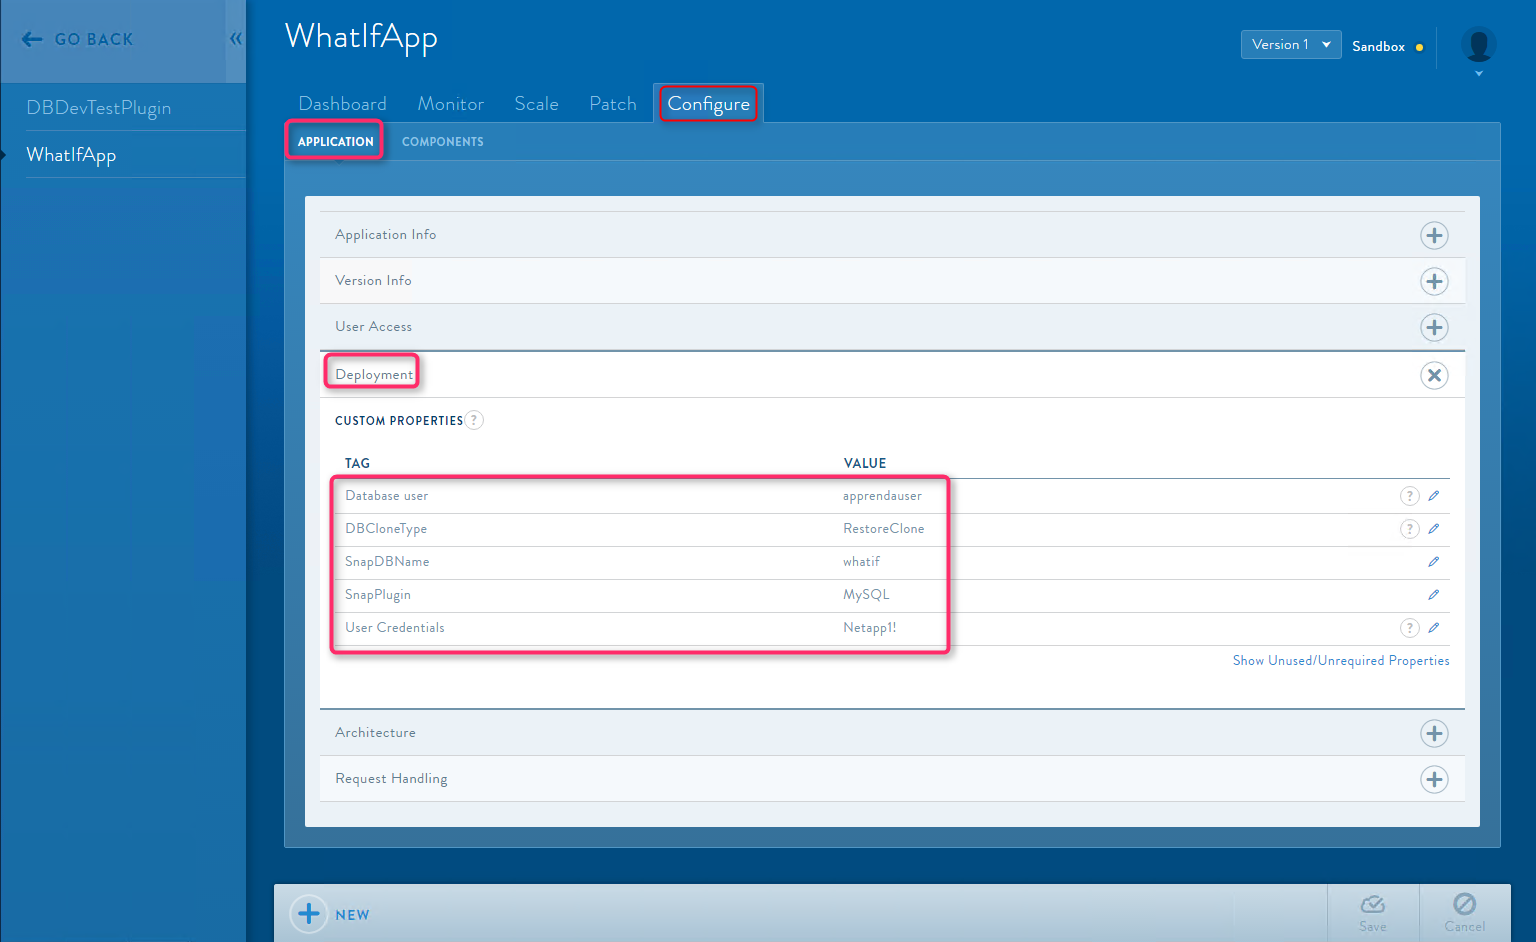
2)If the Application in launched with the custom property DBCloneType as CloneOrignal then the DBDevTest plugin will create a clone
3)If the Application is started with custom property set as Restore clone then, the DBDevTest plugin will restore the application’s database to it’s orignal state from the latest snapshot.